
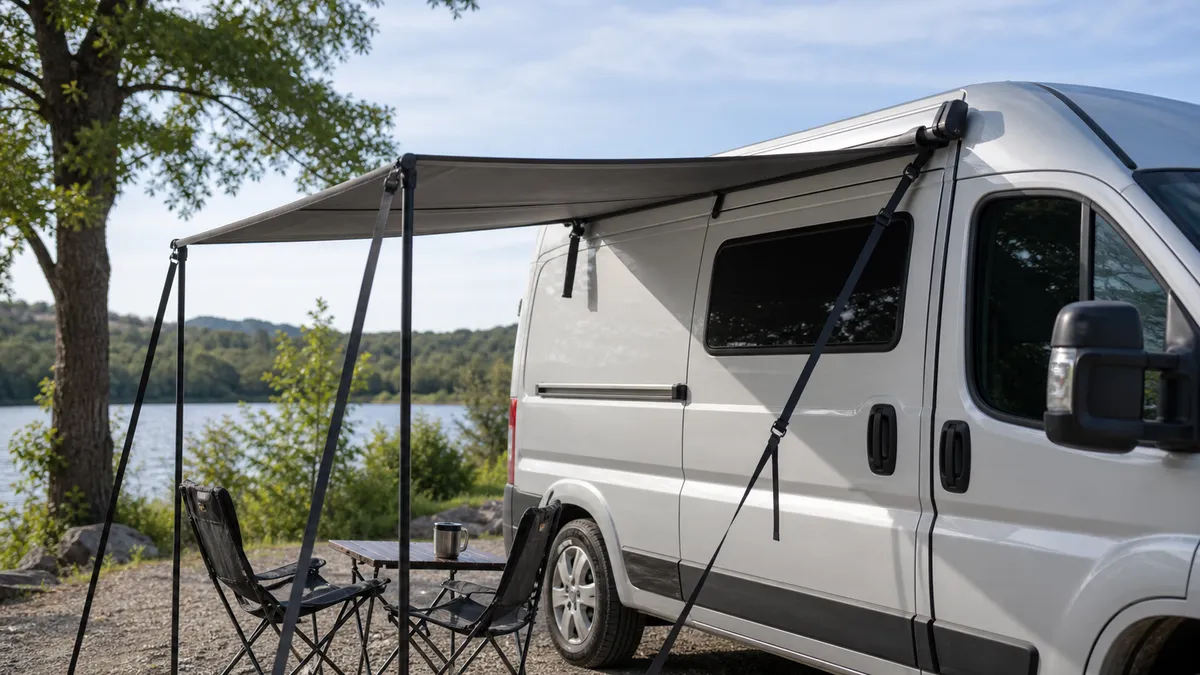
Quick Answer
Can a van awning work with no roof rack?
Sometimes, but find the attachment point first. A van awning without a roof rack can work from a rail, C-channel, real gutter, driveaway connector, tarp tie-off or rear hatch shelter. Parked shade is not road-secured hardware: suction and magnetic connectors are camp-only. Driving hardware needs approved rails, brackets, crossbars or a rack.
Use a rackless van awning only for parked shade unless a real rail, gutter, rack or approved bracket carries the load for travel.
Diagnosis
Most common problems
Check the symptom before buying another shade product.
Factory rail or C-channel is already on the van
Kampa documents keder-style rail connection as a normal driveaway attachment, but fit still depends on the vehicle edge.
A full rain gutter runs along the side
Kampa says this attachment needs a gutter running the length of the awning tunnel, so short trim lips do not count.
Only smooth steel bodywork is available
Dometic sells 3 m suction and magnetic kits, but magnets need steel and suction cups are temporary body attachments.
The roof is aluminum, fiberglass, plastic, pop-top or rented
Magnets do not work on non-steel bodywork, and rental or pop-top roofs need written approval before carrying load.
Find the attachment point before buying a van awning
Start by separating shade while parked from hardware secured for road travel. A driveaway awning tunnel, tarp line, suction cup or magnetic awning strip can help at camp, but that does not make it a highway mount. NHTSA says drivers are responsible for loads that could separate from the vehicle, and FMCSA cargo-securement language gives a sensible benchmark: road hardware needs real structures or tiedowns, not wishful attachment.
Walk the side of the van before shopping. Look for an awning rail, C-channel, factory track, real rain gutter, factory roof rails, a rear hatch, barn doors, sliding door track, pop-top seam, solar panel edge, antenna, roof vent and garage clearance. Kampa lists driveaway attachment heights from 180 cm to 310 cm, so height alone can rule out a tunnel that otherwise looks right.
Door clearance matters as much as shade. Kampa recommends clearance between the end of a tent rail and the door edge for static tents, and the same kind of check applies to sliding door clearance, hatch struts and barn doors. If the tunnel pad blocks the door, rubs paint, crosses a pop-top lift point or traps water against a seal, choose a freestanding shelter, rear hatch shelter or tarp instead.
- Treat a factory C-channel or awning rail as the first thing to inspect.
- Trust a rain gutter only when it runs the awning tunnel length.
- Treat suction cups and magnets as parked-camp connectors, not road hardware.
Choose the least permanent rackless attachment first
The lowest body-risk choice is usually shade that does not ask the van skin to carry side load. A freestanding driveaway shelter can stay on the pitch while the van leaves, and a tarp with poles and guy lines can give shade for a short stop if it is packed down before wind or road travel. A rear hatch shelter can also work well when the living area is behind the van rather than along the sliding door.
Body connectors sit in the middle. A suction cup kit can connect a driveaway awning to smooth bodywork while parked, and Dometic's Limpet kit is a 3 m, 6 mm keder accessory supplied with suction limpets. A magnetic driveaway kit is also 3 m and 6 mm, but it needs suitable steel bodywork. Dirt, curve, heat, wax, water and paint condition can all turn a neat camp idea into a scratch or loose edge.
- Cheap to try does not mean safe to drive with attached.
- Use guy lines and pegs for shelter fabric, then remove fabric before road travel.
- Escalate to rails or crossbars when the awning case must remain on the van.
Ranked Setups
Rackless shade attachments from least permanent to most permanent
Use this table after the diagnosis cards. Start with attachments that avoid drilling, paint load and road-mounted hardware.
| Setup | Effort / cost | Best use | Limit |
|---|---|---|---|
| Freestanding driveaway shelter | Moderate cost, no van body work | Multi-day camp where the van may leave the pitch | Needs space, pegging and a sheltered site |
| Tarp with poles, guy lines and parked over-roof straps | Low cost, high setup discipline | Short shade stop when nothing stays attached for driving | Loose lines and fabric must come off before road travel |
| Rear hatch shelter | Low to moderate cost | Cooking or changing behind a hatch van | Weak fit for side-door living and barn-door vans |
| Suction driveaway connector | Low body work, surface-sensitive | Smooth suitable parked surface and calm camp routine | Not a structural mount and not for dirty or curved panels |
| Magnetic driveaway connector | Low body work, steel body only | Clean smooth steel bodywork at camp | Does not work on aluminum or fiberglass high tops |
| Gutter pole-and-clamp setup | Moderate setup effort | Older vans or work vans with a continuous real gutter | Short trim lips and door channels do not replace a gutter |
| Add awning rail or C-channel | Higher cost, installer or upfitter work | Repeated driveaway awning use on the same side | Needs reinforced points, sealing and water-ingress checks |
| Add roof rack or crossbars | Highest cost and most hardware | Roll-out cases, heavy side awnings and 270-degree awnings | Must match vehicle, rack, bracket spacing and awning manual |
Camp-only attachments are not highway mounts
Do not drive with loose fabric, suction cups, magnetic strips, tarp lines or an awning tunnel still attached to the van. NHTSA reports roughly 850 deaths and almost 19,000 injuries each year in crashes involving road objects, which is enough reason to treat improvised van shade as a pack-down item. The point is simple: if it can peel, flap, slide, pull a seal or unwind, remove it before the van moves.
Rack awning manuals are written around defined supports. Yakima warns that incorrectly mounted racks and loads can loosen during travel, and its SlimShady awning uses a stated crossbar spread range of 24 to 70 inches. Rhino-Rack also warns against excessive overhang beyond support points. Those details show why a single trim clamp, door edge or suction strip cannot stand in for brackets over crossbars.
Use manufacturer instructions as the minimum, not as a dare. A no-rack van awning attachment should be packed before road travel unless the exact mounted hardware, vehicle and manual all say it is built for that job.
- Remove fabric and temporary connectors before driving.
- Do not leave guy lines, tunnel straps or loose poles attached to the van.
- Use road-mounted awning hardware only when the vehicle and awning instructions agree.
No-rack non-fixes to avoid
A missing rack is not fixed by making a weak attachment more aggressive. A bigger suction cup, more magnets, a stronger adhesive strip or a clamp on plastic trim still leaves the pull on the wrong part of the van. Thin body skin, roof-edge trim, door seals and sliding-door tracks are poor places to hang a loaded side shelter.
Drilling can also be the wrong shortcut. Fiamma's vehicle-wall awning instructions call for reinforced points, aligned brackets, checks for internal obstacles such as electrical cables and gas pipes, and mastic around drilled holes to prevent later water entry. If those checks are not available for your van, stop before making holes.
- Do not clamp to seal lips, plastic trim, roof-edge trim or sliding-door tracks.
- Do not rely on adhesive-only rails for side-loaded fabric.
- Do not use another extended cassette awning as the support for a driveaway shelter.
Avoid
Weak fixes that do not solve the missing mount
These ideas can look convenient, but they still leave load, paint, seal or road-travel risk in place.
| Weak fix | Why it fails | Use this instead |
|---|---|---|
| Bigger suction cup | It still depends on paint, curve, dirt, heat and side pull. | Use it only as a parked driveaway connector on a suitable surface. |
| More magnets | They do not work on aluminum, fiberglass, plastic tops or dirty curved panels. | Use a freestanding shelter or rail/rack retrofit. |
| Adhesive-only rail | Side load, heat and water can defeat a strip that is not mechanically approved. | Install a proper rail only with vehicle-specific guidance. |
| Trim, seal or door-track clamp | Those parts are not meant to carry fabric pull or vibration. | Clamp only where the product and vehicle manual allow it. |
| Screws into unknown sheet metal | Hidden wiring, gas lines, water ingress and weak panels can create a larger repair. | Find reinforced points or use a qualified upfitter. |
| Driving with tarp lines or tunnel straps attached | Loose fabric and lines can separate, flap or damage the vehicle. | Pack everything before road travel. |
| Extended cassette awning as a shelter support | Dometic warns that a driveaway tent should not be used with the cassette awning extended. | Rewind the cassette after connection or use a separate driveaway support. |
When to install rails or a roof rack instead
Move from rackless shade to rails or a roof rack when the awning case must remain on the van, when trips are frequent, when a heavy roll-out awning is planned, or when a 270-degree awning is on the shortlist. These awnings add weight and leverage. They need brackets over known supports, not paint, trim or a guessed body edge.
Model-specific roof guidance matters. Mercedes-Benz Sprinter body guidance, for example, describes distributed support feet, C-rail requirements for the cited generation and limits on drilling new cab-roof holes without upfitter consultation. Do not copy that number onto another van; use it as proof that vehicle makers treat roof attachments as engineered work.
Rails and racks also help when solar, vents, pop-top hardware and garage clearance compete for roof space. If rackless camp shade keeps creating conflicts, read the roof-rack awning guide before buying brackets. If the bigger question is whether to use a driveaway, roll-out or tarp for a campervan, use the campervan awning guide or broader van awning guide after this diagnosis.
- Choose rails or crossbars when hardware must stay attached during road travel.
- Use approved reinforced points before installing a wall or body bracket.
- Check water ingress risk around every drilled or sealed hole.
Stop triggers before you set up camp
Pack down before wind if the site is exposed, gusts are rising, pegs are loosening or the fabric is starting to snap. Dometic's driveaway awning manual describes light to moderate weather use, recommends a flat wind-protected site, and tells installers to peg guy lines in line with their seams. Rhino-Rack says to avoid setup in windy conditions, use guy ropes and lower the front end in rain to reduce pooling.
Stop for vehicle conflicts too. Do not set up if the sliding door, rear hatch, barn doors or pop-top cannot open safely. Do not attach suction cups or magnets to hot, wet, dirty, waxed, curved or non-steel surfaces. Do not drill where wiring, gas, trim, airbags, roof structure or reinforcement is unknown. Do not attach anything that rental, lease or campground rules forbid.
- Pack down before wind, leaving camp or road travel.
- Stop if a door, hatch, pop-top, solar panel or antenna conflicts with the fabric.
- Choose freestanding shade when the van surface cannot be trusted.
This won't fix it
Do not skip these checks
- Do not drive with loose fabric, tarp lines, suction cups, magnetic strips or an awning tunnel attached.
- Do not screw brackets into unknown sheet metal, trim or door frames without confirmed reinforced points.
- Do not use suction or magnetic connectors on dirty, curved, hot, wet or non-compatible bodywork.
- Pack down before wind, exposed weather, road travel or leaving camp unattended.
- Stop if doors, hatch struts, pop-top movement, solar panels, antennas or garage clearance conflict.
Read Next
Related fixes
Vehicle Awning Guide
Use this when vehicle awning is closer to the real constraint than the current page.
Van Awning Guide
Use this when van awning is closer to the real constraint than the current page.
Campervan Awning Guide
Use this when campervan awning is closer to the real constraint than the current page.
Roof Rack Awning Guide
Use this when roof rack awning is closer to the real constraint than the current page.
Questions
FAQ
Can I mount a roll-out awning directly to van sheet metal?
Usually no, not without approved reinforced points and instructions for that van. Fiamma-style wall awning guidance calls for bracket alignment, reinforced areas, checks for hidden cables or gas pipes and sealing around holes. If those checks are not available, use a rack, rail, crossbars or a freestanding shelter.
Are suction cup van awnings safe?
They can help as parked driveaway connectors on smooth suitable bodywork. Treat them as temporary camp attachments, not structural road mounts. Clean the surface first, watch paint and panel flex, use pegs and guy lines correctly, and pack down before wind or driving.
Can I drive with a magnetic awning strip attached?
Do not treat a magnetic strip as highway-secured hardware unless the exact product and vehicle instructions say so. A magnetic kit also needs steel bodywork, not aluminum, fiberglass, plastic trim or many high-top shells. Remove it before road travel.
Do I need a roof rack for a 270-degree awning?
In most practical cases, yes, or another approved structural mount. A 270-degree awning adds case weight and leverage around the rear corner, so it needs known supports and brackets. If no rail, rack or approved bracket exists, choose a lighter camp shelter instead.
Will a driveaway awning work if my van has sliding doors?
It can, but check the tunnel height, rail length, door-edge clearance, hatch struts, barn doors and pop-top movement before ordering. Kampa notes that attachment height and usable rail length matter. If the sliding door rubs the tunnel or seal pad, choose a different side or freestanding shelter.