
Quick Answer
Quick answer for a 270 degree awning
Buy a 270 degree awning when your camp regularly uses both the vehicle side and rear, and only after the vehicle roof, rack, brackets and packed-case clearance are proven. Choose a straight awning, tarp or freestanding shelter when shade is mostly for one door, short lunch stops, tight roof-load margin or windy exposed camps.
Choose a 270-degree awning for repeated side-and-rear camp work with verified rack and bracket margin; choose lighter shade when one-door coverage, budget or pack-down speed matters more.
Buying Direction
What to buy or use for vehicle coverage
Use this table for the buying direction. The detail below explains limits, costs and edge cases.
| Situation | Buy / use this | Why |
|---|---|---|
| Tailgate kitchen plus side-door living area | 270-degree awning with verified rack, bracket and side-orientation fit | The wrap covers the rear food or drawer area and the side seating zone from one mounted case. |
| One-door shade, quick lunches or occasional weekend use | Straight pull-out awning or compact tarp | The simpler setup gives faster shade with less roof weight and less wind surface. |
| Tight roof-load margin, roof tent already fitted or two light crossbars | Lighter awning, rack upgrade or no roof-mounted awning yet | The lowest vehicle, rack, bar, bracket or accessory limit controls the practical margin. |
| Long base camp with privacy or weather screening needs | 270 awning only if the wall kit, storage volume and anchoring routine fit | Walls can help privacy and coverage, but they add cost, packed bulk, fabric load and setup time. |
| Windy ridge, beach, desert edge or no reliable anchor points | Smaller secured shade or pack-down-first setup | Freestanding claims are model-specific; rising wind, walls or moving arms should trigger support or pack-down. |
| Unknown left/right fit, rear hatch conflict or garage-height problem | Do not order until the side, packed case and rear opening path are checked | The wrong orientation can point the wrap away from camp or block the tailgate that justified the purchase. |
Gear research
270-degree awning categories to compare
Compare these setups after the rack, brackets, orientation, walls and wind routine are clear. Use the links as category research, then verify fit against the vehicle and rack instructions.
Wraparound
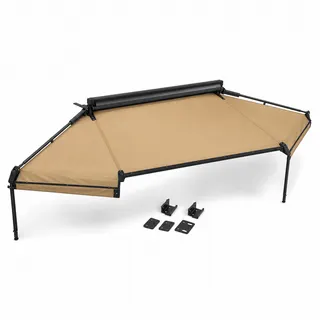
270-degree wraparound awning
For repeated side-door plus rear-kitchen camp work.
- Side and rear coverage
- Higher roof and bracket demand
- Side selection matters
Check:Closed length, awning weight, bracket instructions and left/right orientation.
Research wraparound fitFreestanding
Freestanding 270 awning
For less pole work in calm conditions, not storm use.
- Fewer poles when calm
- Still needs support judgment
- Model-specific wind wording
Check:Manual support state, guy-line points, wall-kit behavior and pack-down speed.
Check support rules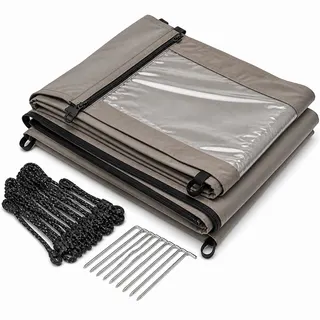
Walls and anchors
Wall kit and anchoring support
For privacy, screening and longer stays only when storage and wind routine fit.
- Adds privacy and coverage
- Adds packed volume
- More fabric in wind
Check:Exact awning model, wall compatibility, pegs, guy ropes and storage room.
Research wall kitsWhat 270-degree coverage actually buys
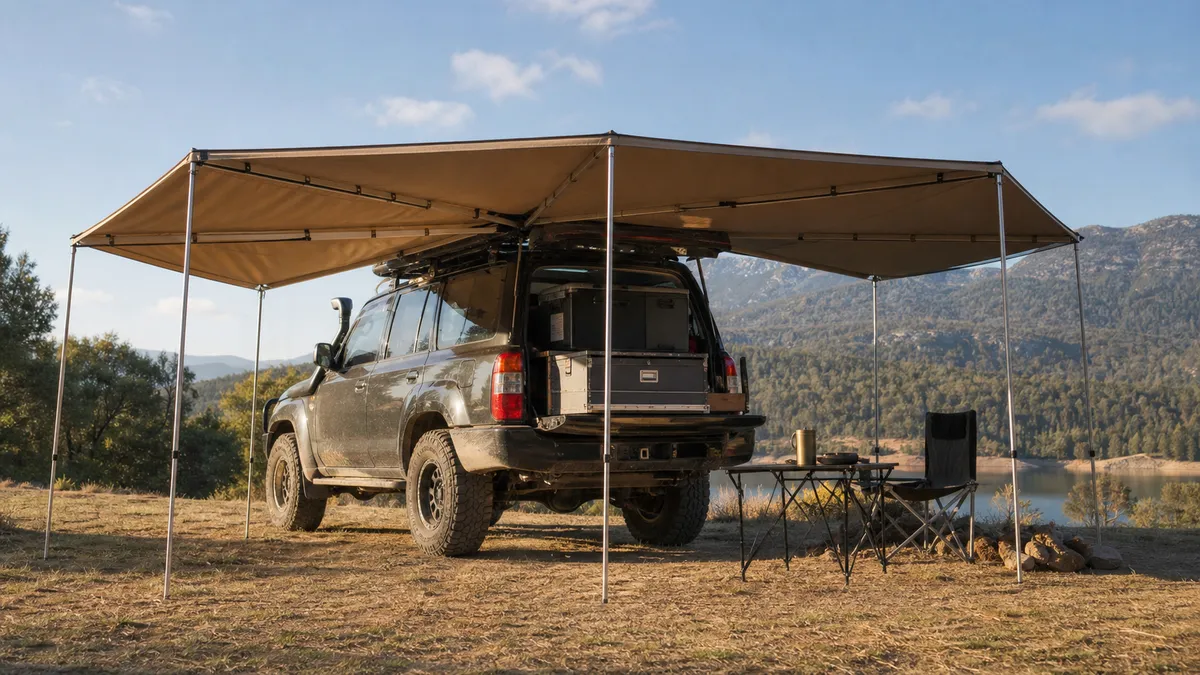
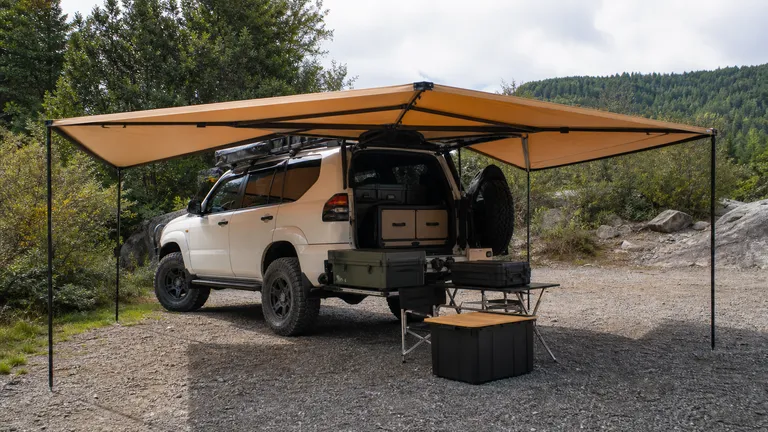
A 270 degree awning is not automatically better than a straight side awning. It is better when the vehicle side and rear are both part of camp: a sliding door or side kitchen on one face, and rear drawers, a tailgate table, fridge slide, spare-parts box or cooking area at the back. If the rear quarter is not used, the awning becomes heavy roof cargo that mostly shades empty ground.
Coverage numbers vary by model, so treat them as fit examples, not a universal promise. Rhino-Rack lists 12.3 square meters of coverage for its Batwing 270 Freestanding model, Alu-Cab lists 10 square meters for the 270 Shadow Awning, and iKamper lists 121 square feet for the ExoShell 270. Those numbers matter only after you know where chairs, doors, drawers and the tailgate actually sit.
The best routine for a 270 is repeated side-plus-rear work. Group cooking, repair shade, a rear kitchen drawer, a side-door living area or a tailgate table can justify the bulk because one awning protects the whole vehicle corner. A solo traveler who opens shade for ten minutes at lunch usually gets more value from a straight pull-out awning or a tarp.
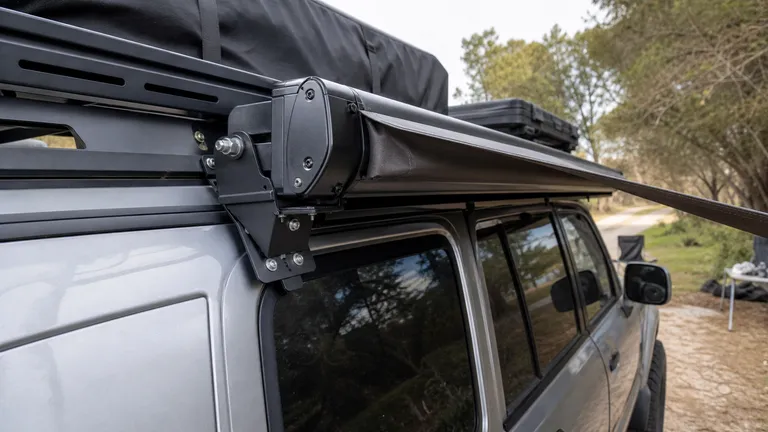
Packed size is part of the coverage trade. Alu-Cab lists a 2600 mm closed length for the 270 Shadow Awning, iKamper lists 103.5 inches for the ExoShell 270, and Rhino-Rack lists a 2.2 meter packed length for the Batwing 270 example in the research report. Measure the case against the roof tent, ladder, roof box, side mirror line, garage opening and trail branches before treating coverage as the main spec.
Wall kits can make a 270 feel like a room, but that is not free coverage. Walls add model-specific fabric, storage bags, poles or clips, more pegs, more guy ropes and more fabric area for wind to load. Buy walls for repeated privacy or weather-screening needs, not because the product photo makes the base awning look unfinished.
Compare shade types
270 awning vs straight awning vs tarp
Use this table to keep the 270 purchase narrow. The larger awning is worth it only when its extra shaded zones are used often.
| Setup | Coverage | Weight and rack demand | Wind behavior | Best fit |
|---|---|---|---|---|
| 270-degree awning | Side plus rear wrap for tailgate, drawers and side living area | Manufacturer examples commonly sit around 24-32 kg, with some installed awning and bracket packages around 35.5 kg | Large fabric arc needs model-specific support, guying and early pack-down judgment | Overlanding rigs where the side and rear zones are used on most trips |
| Freestanding 270 awning | Similar wrap with fewer support poles in calm conditions on some models | Still heavy enough to demand rack, bracket and hinge checks | Freestanding does not mean no anchors; follow the exact manual and support state | Frequent camp use where fast deployment matters and wind routine is disciplined |
| Straight pull-out awning | Rectangular shade beside one vehicle side | Usually simpler and lighter than a full wrap | Less fabric area, but still needs legs, guy lines or manual guidance | Lunch stops, one-door cooking and tight budgets |
| Tarp or freestanding shelter | Flexible shade away from or beside the vehicle | No permanent roof case, but poles and anchors carry the work | Anchor quality and setup skill matter more than a vehicle bracket | Occasional use, overloaded racks or camps where the vehicle leaves during the day |
Rack, bracket and load checks before you buy
Start with the vehicle roof guidance, then count the rack, platform or crossbars, mounting brackets, awning case, wall kit, roof tent, roof box, solar panel, recovery boards and any quick-release hardware. Yakima's load guidance supports subtracting rack and accessory weight from the vehicle roof limit before counting usable payload. Rhino-Rack also separates on-road, off-road and static load language and says accessory weight must be included.
Dynamic and static loads are not interchangeable. Dynamic load is the driving load; a higher parked number does not make highway travel or rough-road travel safe with a heavy awning. If the roof tent already uses much of the rack margin, the right answer may be a straight awning, tarp or rack change before adding a wraparound case.
Use the lowest relevant rating in the chain. The vehicle roof, rack feet, platform, crossbars, side rails, brackets and awning instructions all matter. Do not assume factory crossbars are adequate for a long 270 case unless the exact vehicle, rack and awning documents support that install.
Bracket instructions are model-specific. Rhino-Rack's Batwing fitting instructions for the cited model state that all three brackets must be used and spaced equally, and list the awning with mounting brackets at about 35.5 kg. That does not create a universal spacing rule for every awning, but it shows why two light bars and a long unsupported rear case are a poor assumption.
Road securement matters after installation. NHTSA's secure-load guidance is a general road-safety source: secure roof or trailer cargo, avoid excess cargo and double-check loads. It does not approve any awning bracket. Treat it as a reminder not to drive with loose, marginal, damaged, unverified or overloaded mounts.
After rough or corrugated roads, inspect the awning, brackets, fasteners and rack connections before the next highway section. The OVS manual supports regular fastener and roof-rack connection checks and more frequent inspection after rough roads. That check is maintenance, not a guarantee that the original mount was adequate.
- Count the awning, brackets, walls, rack, roof tent, boxes and recovery gear together.
- Use driving and off-road limits for travel decisions; static parked numbers do not replace them.
- Verify exact bracket count, bracket spacing, fasteners and rack compatibility from the awning and rack instructions.
Real budget: awning, brackets, walls, freight and rack margin
Do not use a single evergreen price range for every 270. The focused research found broad observed pricing on May 22, 2026: OVS listed lightweight and standard 270 models across sale and roughly thousand-dollar territory, Rhino-Rack listed a Batwing 270 Freestanding model at $1,299.99 MSRP, and iKamper listed the ExoShell 270 at $1,950. Treat those as dated examples, not fixed prices.
The base awning is only one line. Brackets, freight, quick-release hardware, extra support poles, pegs, guy ropes, wall kits, storage bags and replacement parts can change the purchase. If the rack has to be upgraded first, the rack upgrade belongs in the awning budget because it is part of the decision.
Wall kits deserve a separate yes-or-no decision. A wall set can add privacy, wind screening or a longer living space, but Darche's wall-set guidance also points back to anchoring with guy ropes and pegs whenever in use. More fabric can be useful at base camp and annoying on a quick overnight stop.
If the budget only works by ignoring brackets, walls, freight or rack margin, the purchase is not ready. Use a straight side awning or tarp until the full installed setup is affordable and documented.
Budget checks
Budget items beyond the awning case
Use this list before comparing a 270 awning with a straight awning or tarp.
| Budget item | Why it matters | Decision note |
|---|---|---|
| Base 270 awning | Coverage, packed length, fabric area and hinge design vary by model. | Use dated market examples only as quote context. |
| Brackets and rack hardware | Some awnings need specific bracket count or spacing to distribute load. | Do not reuse random brackets without matching the rack and awning instructions. |
| Wall kit or room kit | Adds privacy and weather screening, but also adds volume, fabric load and anchoring work. | Buy only when longer camp stays or privacy needs repeat. |
| Freight, storage and spares | Long cases and wall bags can add shipping, storage and repair costs. | Check replacement poles, arms, fabric and fasteners before buying. |
| Rack upgrade | A stronger rack can cost more than the awning add-on that triggered the check. | Include it when the current rack margin is unclear or too tight. |
Local availability, freight and model changes can move prices outside the examples.
Side, hatch and packed-case fit checks
Order the side that wraps toward the camp you actually use. Rhino-Rack sells left and right Batwing 270 versions; iKamper uses driver and passenger side versions for ExoShell 270. Those terms are not interchangeable across markets and vehicles. Check the product diagram from the rear of your vehicle before buying.
For curbside camping, the passenger side may be convenient in one country and wrong in another. For trail camps, the best side may be the side that keeps the kitchen out of brush, away from recovery boards or closest to the rear drawer path. Do not choose the side from a photo of a different vehicle layout.
Open everything before checkout: rear hatch, tailgate, barn doors, sliding door, passenger doors, roof-tent ladder, roof box lid, rear tire carrier, shovel mount, jack mount and fridge slide. A wraparound arm that blocks the tailgate defeats one of the main reasons to buy the awning.
Measure the closed case as gear that stays outside the vehicle. It can affect garage height, ferry clearance, tree branches, mirror sight lines, narrow trail brush and side-mounted recovery gear. A premium awning that hits the garage or blocks a hatch is a poor fit even if the coverage area is ideal.
- Confirm whether the brand names sides as left/right, LHS/RHS, driver/passenger or vehicle side.
- Mark the closed case on the rack and open every door, hatch and roof-tent component.
- Check side projection against mirrors, roof boxes, ladders, branch strikes and garage height.
Freestanding does not mean leave it open in wind
Freestanding usually means fewer poles in calm conditions. It does not mean the awning is storm-proof, anchor-free or safe to leave open while wind builds. iKamper publishes model-specific figures for its ExoShell 270 that differ by support state, and Darche publishes its own freestanding and tied-down test claims. Use those only for the exact model and setup described.
Manuals and warranty language are more important than headline coverage. OVS warns against erecting the awning, or awning with walls, in windy conditions where injury or property damage may occur. Alu-Cab warranty language recommends deploying guy ropes when wind picks up and when in doubt. Darche's freestanding product page still recommends included poles and guy ropes for unexpected gusts.
Walls change the wind decision. A wall kit can block wind for people sitting under the awning, but it also adds fabric surface for wind to push. If walls are attached, use support legs, guy ropes and pegs earlier, and pack down sooner when the fabric snaps, pegs pull, arms move, hinges flex or safe anchor points are not available.
Do not drive or sleep on a marginal setup. Pack down when wind is rising, when the manual says not to deploy, when walls make the awning hard to control, when a guy rope cannot hold, when the arm or hinge moves, or when no safe anchor points exist. The awning is replaceable; the vehicle, roof rack and people around camp are not.
- Treat any wind number as model-specific, support-state-specific and not transferable to every 270 awning.
- Use poles, legs, pegs and guy ropes before the fabric starts snapping or the arms move.
- Pack down earlier when wall kits are attached or anchor points are weak.
When a 270 degree awning is overkill
Choose a straight pull-out awning when shade is mostly beside one door, when the lunch stop is short, or when solo pack-down speed matters more than coverage. You will carry less permanent weight, spend less on brackets and have less fabric to secure in gusts.
Choose a tarp or freestanding shelter when shade needs to move away from the vehicle, stay at camp while the vehicle leaves, or avoid a crowded roof. A tarp is less polished, but it can solve occasional shade without committing the rack to a heavy side case.
Upgrade the rack before buying when the lowest load limit is unclear, when two light factory bars are the only support, when a roof tent already dominates the roof plan, or when the awning maker's bracket instructions cannot be met. Do not use a static parked number as permission for rough-road travel.
Skip the 270 entirely when the correct side cannot be ordered, the closed case blocks the rear hatch, the garage or trail clearance fails, the wall kit pushes the budget beyond reach, or the wind routine depends on hoping the weather stays calm. Those are not small inconveniences; they are signs the awning does not match the vehicle.
Watch-outs
Before you buy or install
- Do not treat fabric coverage area as proof that the vehicle, rack, bars, platform or brackets can carry the awning.
- Do not assume factory crossbars are adequate for a long 270 case unless the exact vehicle, rack and awning documents support it.
- Do not transfer wind numbers from one model, support state or brand test to another 270 awning.
- Do not drive with loose, damaged, marginal, unverified or overloaded awning mounts.
- Do not attach wall kits in rising wind unless the exact manual, support legs, guy ropes, pegs and anchor points all support the setup.
Read Next
Related guides if your situation is different
Vehicle Awning Guide
Use this when vehicle awning is closer to the real constraint than the current page.
4x4 Awning Guide
Use this when 4x4 awning is closer to the real constraint than the current page.
Roof Rack Awning Guide
Use this when roof rack awning is closer to the real constraint than the current page.
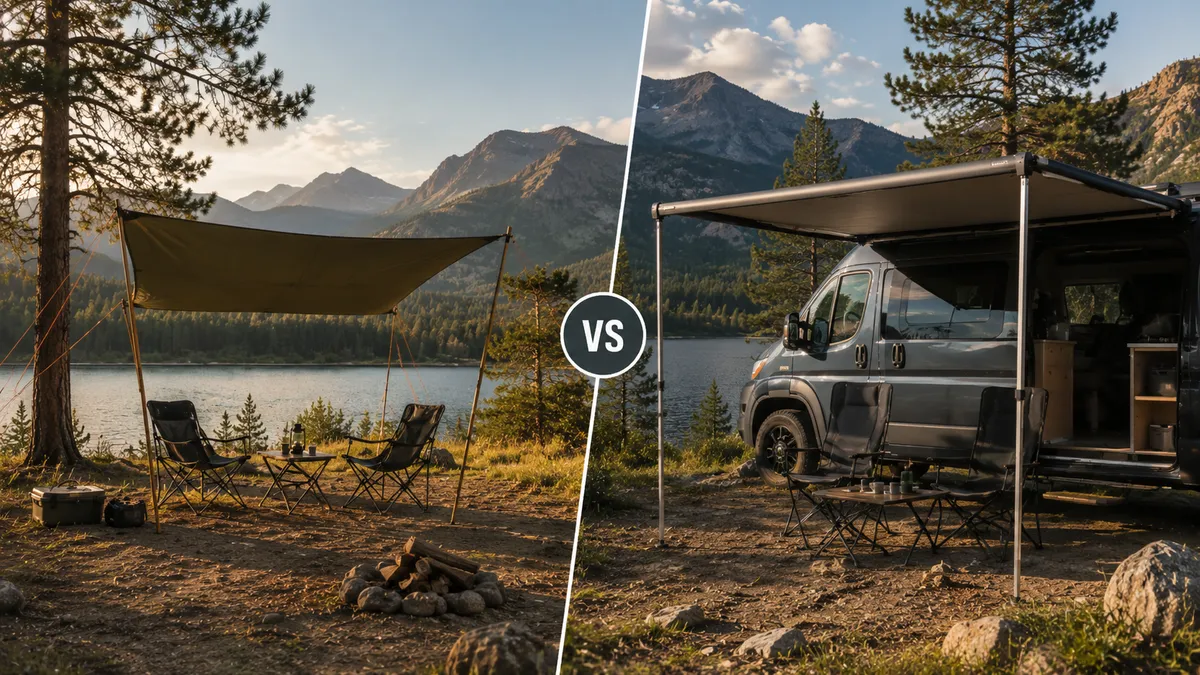
Camping Tarp vs Awning
Use this when camping tarp vs awning is closer to the real constraint than the current page.
Questions
FAQ
Is a 270-degree awning worth it for overlanding?
It is worth it when the side and rear of the vehicle are both used on most trips, such as a side-door living area plus a tailgate kitchen or rear drawers. It is usually overkill for quick shade, one-door cooking, tight budgets or a rack that is already close to its limit.
How heavy is a 270-degree awning with brackets?
Manufacturer examples vary. Alu-Cab lists 24 kg for its 270 Shadow Awning, iKamper lists 30 kg for ExoShell 270, and Rhino-Rack lists 69.9 lb product weight, with fitting instructions showing about 35.5 kg for the awning and brackets on the cited Batwing model. Check the exact model.
Can a 270 awning go on factory crossbars?
Only if the exact vehicle, crossbars, bracket kit and awning instructions support the installed weight, bracket spread and driving loads. Do not assume factory bars are enough for a long wraparound case. If the lowest relevant limit is unclear, choose lighter shade or upgrade the rack first.
Is a freestanding 270 awning safe in wind?
Freestanding does not mean storm-proof. It usually means fewer poles in calm conditions on some models. Follow the exact manual, add legs or guy lines early, and pack down when wind rises, walls are attached, pegs pull, fabric snaps, arms move or no safe anchor points exist.
Which side should a 270 awning mount on?
Choose the side that wraps toward your real camp area and rear access path. Check whether the brand uses left/right, LHS/RHS or driver/passenger wording, then view the diagram from the rear of your own vehicle. Confirm tailgate, door, roof tent and garage clearance before ordering.
Are wall kits worth buying with a 270 awning?
Wall kits are worth it for repeated privacy, wind screening or longer base camps when storage and anchoring time are acceptable. They are not automatic upgrades. They add cost, packed volume, more fabric in wind and model-specific compatibility checks, so budget them separately from the base awning.